Using the Event Capture app
About the Event Capture app
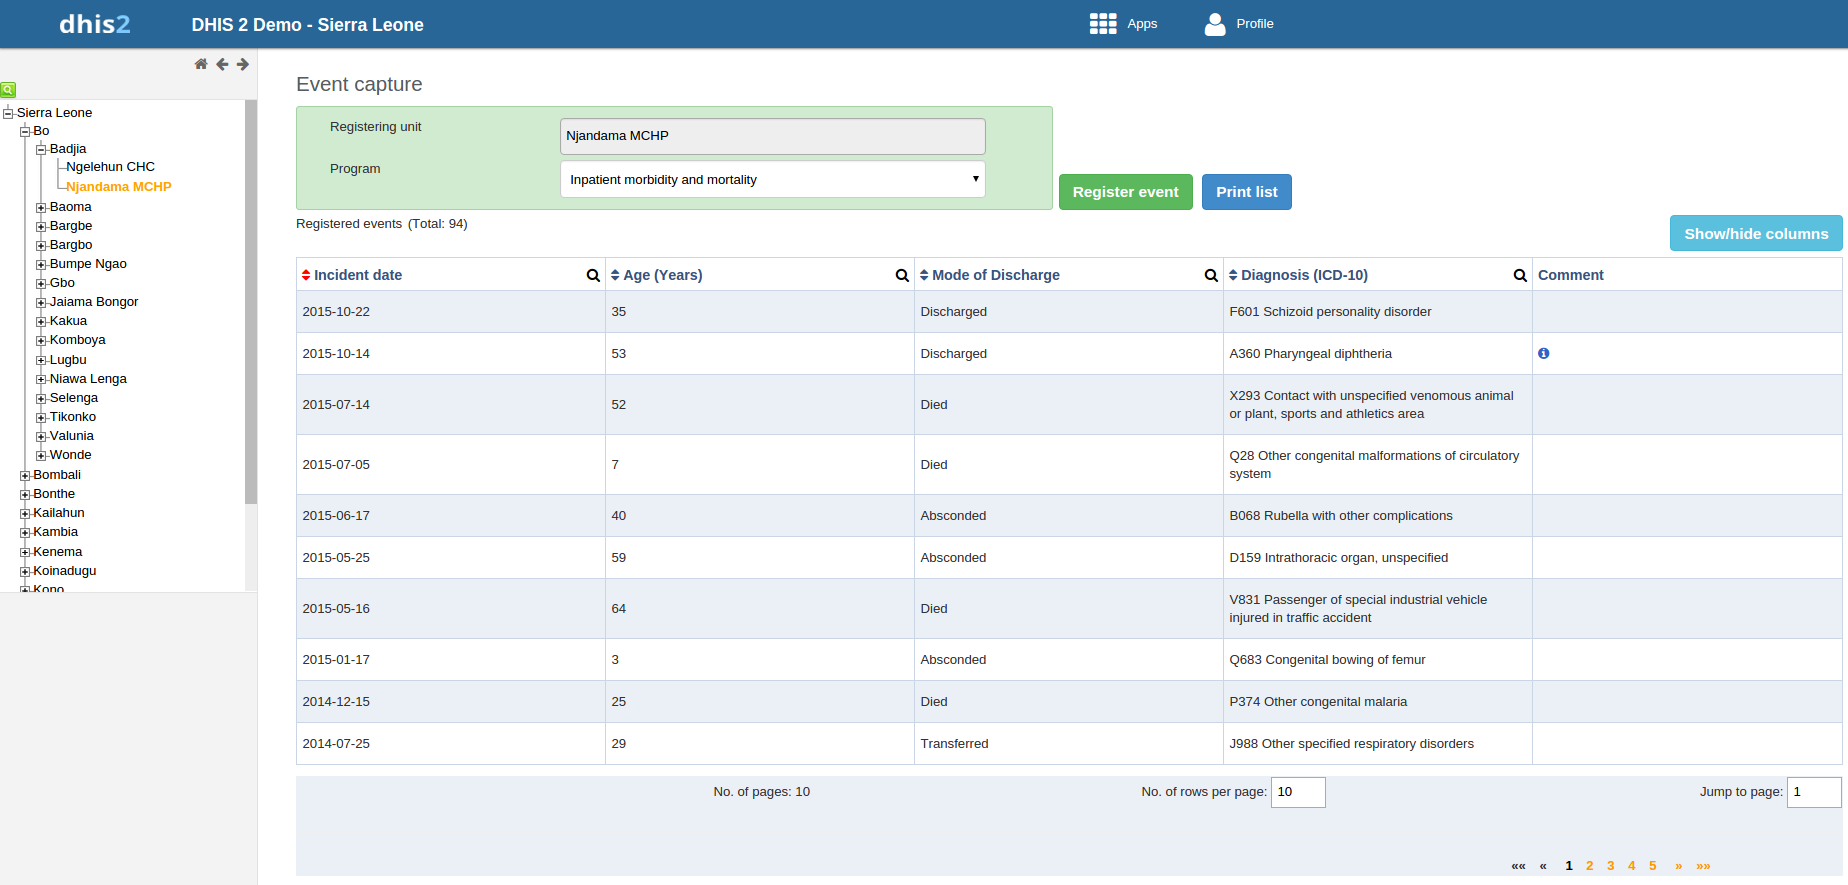
In the Event Capture app you register events that occurred at a particular time and place. An event can happen at any given point in time. This stands in contrast to routine data, which can be captured for predefined, regular intervals. Events are sometimes called cases or records. In DHIS2, events are linked to a program. The Event Capture app lets you select the organisation unit and program and specify a date when a event happened, before entering information for the event.
The Event Capture app works online and offline. If the Internet connectivity drops, you can continue to capture events. The events will be stored locally in your web browser (client). When connectivity has returned, the system will ask you to upload the locally stored data. The system then sends the data to the server where the data is stored.
Note
If you close the web browser while in offline mode, it is not possible to reopen a new web browser window and continue the working session. However the data will still be saved locally and can be uploaded to the server the next time the machine is online and the you have logged into the server.
-
You only see programs associated with the organisation unit you've selected and programs you've access to view through your user role.
-
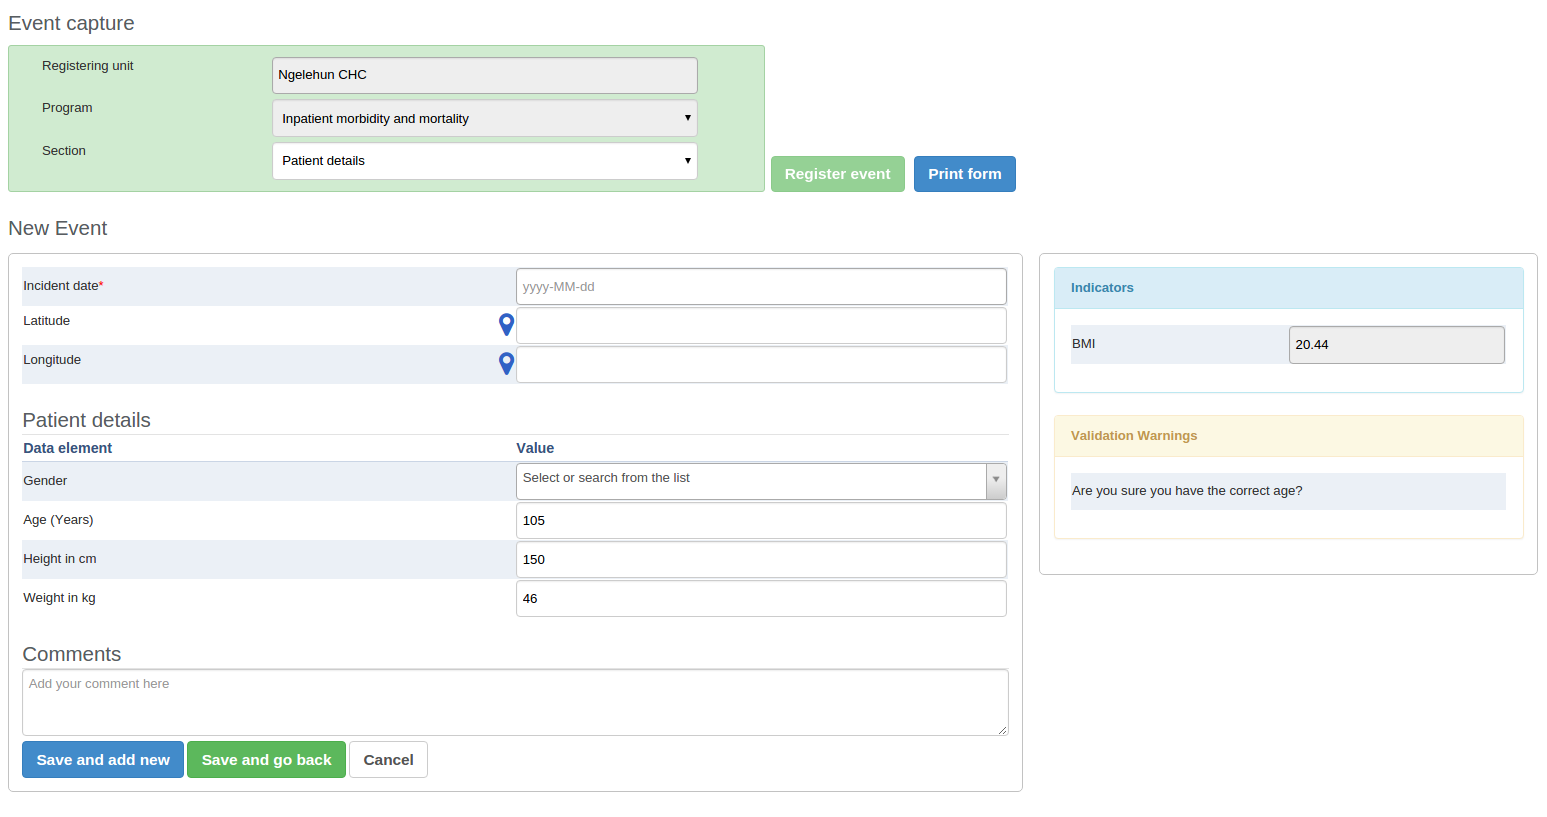
Both skip-logic and validation error/warning messages are supported during registration.
-
When you close an organisation unit, you can't register or edit events to this organisation unit in the Event Capture app. You can still view and filter the event list and view the details of an event.
-
On-the-fly indicator expression evaluation is supported. If a program has indicators defined for it and the moment all values related to the indicator expression are filled, the system will calculate indicator and display the result.
-
Sorting: this can be done by clicking the sorting icon of each column header. A red sorting icon implies the current sorting column. However, the sorting functionality works only within the page displayed. Currently, it is not possible to do sorting from serverside.
-
Filtering: this is done by clicking the small search icon shown to the right of each column header. Clicking them provides an input field to type a filtering criteria. The system starts applying the filter the moment a user starts to type. During filtering it is possible to define start and end dates for date type data elements and lower and upper limits for number types. Server side filtering is not-support at the moment.
Register an event
-
Open the Event Capture app.
-
Select an organisation unit.
-
Select a program.
You'll only see programs associated with the selected organisation unit and programs you've access to through your user role.
-
Click Register event.
-
Select a date.
-
Fill in the required information.
If the program's program stage is configured to capture GPS coordinate, you can enter the coordinates in two ways:
-
Enter values directly in corresponding fields.
-
Choose a location in a map. The map option also displays polygons and points that are defined for organisation units.
-
-
Click Save and add new or Save and go back.
Note: Some data elements in an event might be mandatory (marked with a red star next to the data element lable). What this means is that all mandatory data elements must be filled in before the user is allowed to save the event. The exception to this is if the user has the authority called "Ignore validation of required fields in Tracker and Event Capture". If the user has this authority, the mandatory data elements will not be required to be filled in before saving and the red star will not be displayed next to the data element lable. Note that super user that have the "ALL" authority automatically have this authority.
Edit an event
-
Open the Event Capture app.
-
Select an organisation unit.
-
Select a program.
All events registered to the selected program show up in a list.
-
Click the event you want to modify and select Edit.
-
Modify the event details and click Update.
Edit events in grid
The Edit in grid function allows you to edit a selected event within the table but only those columns (data elements) visible in the grid. If you need more columns, use Show/hide columns to specify which columns should be displayed in the list.
-
Open the Event Capture app.
-
Select an organisation unit.
-
Select a program.
All events registered to the selected program show up in a list.
-
Click the event you want to modify and select Edit in grid.
-
Modify the event details.
-
Click on another event to close the edit mode.
Share events in edit mode
You can share an event in edit mode via its web address.
-
Open the Event Capture app.
-
Open the event you want to share in edit mode.
-
Copy the URL.
Make sure that the URL contains "event" and "ou" (organisation unit) parameters.
-
Paste the URL in the sharing method of your choice, for example an e-mail or a message within DHIS2.
If you're not logged in to DHIS2 when you click the link, you'll be asked to do so and then taken to the dashboard.
View an event audit history
-
Open the Event Capture app.
-
Select an organisation unit.
-
Select a program.
All events registered to the selected program show up in a list.
-
Click an event and select Audit history.
Delete an event
-
Open the Event Capture app.
-
Select an organisation unit.
-
Select a program.
All events registered to the selected program show up in a list.
-
Click an event and select Remove.
-
Click Remove to cocnfirm the deletion.
Modify an event list's layout
You can select which columns to show or hide in an event list. This can be useful for example when you have a long list of data elements assigned to a program stage. Once you've modified the layout, it's saved on your user profile. You can have different layouts for different programs.
-
Open the Event Capture app.
-
Select an organisation unit.
-
Select a program.
All events registered to the selected program show up in a list.
-
Click the Show/hide columns icon.
-
Select the columns you want to display and click Close.
Print an event list
-
Open the Event Capture app.
-
Select an organisation unit.
-
Select a program.
All events registered to the selected program show up in a list.
-
Click Print list.
Download an event list
-
Open the Event Capture app.
-
Select an organisation unit.
-
Select a program.
All events registered to the selected program show up in a list.
-
Click the Downlad icon and select a format.
You can download an event list in XML, JSON or CSV formats.